This year has been about making the most of the little things. Adding a bit of beauty to our spaces is more meaningful than ever now that we spend so much time at home. So whether you’re looking for a crafty gift or a centerpiece worthy of a French influencer, a gorgeous flower bouquet is just what you need. These tips will help you create one that’s show-stopping.
Gather the Materials
The perfect flower bouquet isn’t as simple as gathering things you have lying around the house. However, once you have the items you need, you’ll be set to create quite a few masterpieces of your own.
Before you select your flowers (more on that next), you’ll need to purchase some basic bouquet materials, such as bouquet pins and tape, floral shears, and wrapping paper and/or ribbon. If you plan on displaying your bouquet at home, rather than gifting it, consider the vases you have on hand. A mason jar is charming for wildflowers, but roses or peonies demand a more elegant vessel.
Select the Flowers
Perhaps the most important part of putting together a bouquet: visualize what flowers you want and determine how you will get them. While you can purchase flowers from many online retailers, you may want to opt for a local grocery store or flower market so that you can see exactly what you’re buying.
Before shopping, think about your budget as well as the number of flowers you need. If you’re going with a mixed bouquet, you should expect to purchase roughly 10 flowers for a small arrangement, 20 for a medium arrangement, and 30 for a large arrangement.
*Note these numbers will vary depending upon the flowers you choose, so be sure to research the proper quantity once you’ve selected the type of flowers for your bouquet.
Prep the Flowers
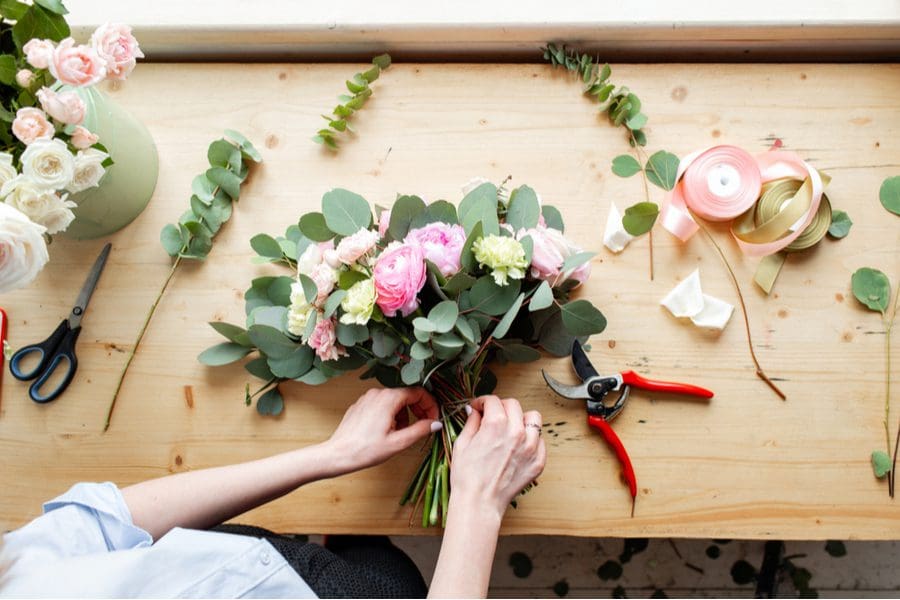
You’ll want to remove all leaves, thorns, and other foliage from the flowers so that only the stems are left. Trim the stems at a 45-degree angle so that all the flowers have stems that are roughly the same length. An angled cut makes it easier for the flowers to take in water and will keep them fresh longer.
Arrange the Flowers
Now comes the fun part; select the focal point of your bouquet (perhaps the largest flower) and use that as an anchor from which you add all other flowers in a bunch. Your bouquet will likely rely on a combination of different colors, textures, and other aesthetic elements to draw the eye.
As you add flowers to your bouquet around the focal point, wrap your bundle with floral tape to keep everything in place. This ensures that your flowers end up exactly where you want them, so your bouquet is as beautiful as you envisioned it.
Finishing Touches
For a simple finish that’s ideal for a portable, gift-able bouquet, wrap the stems in floral tape, beginning about an inch away from the flower head and working your way down until there’s about an inch of stem left. You will then use the ribbon of your choice to run parallel to the tape in the same fashion. Finally, utilize floral pins to hold the ribbon in place.
You could also wrap your bouquet in Kraft paper or place it in a decorative vase. Whatever your visual preference is, be sure to research any additional materials you need to complete your vision.
DIY flower arranging might sound too intimidating to attempt, but if you follow these steps (and with a little practice), your bouquets will be the envy of everyone you know.