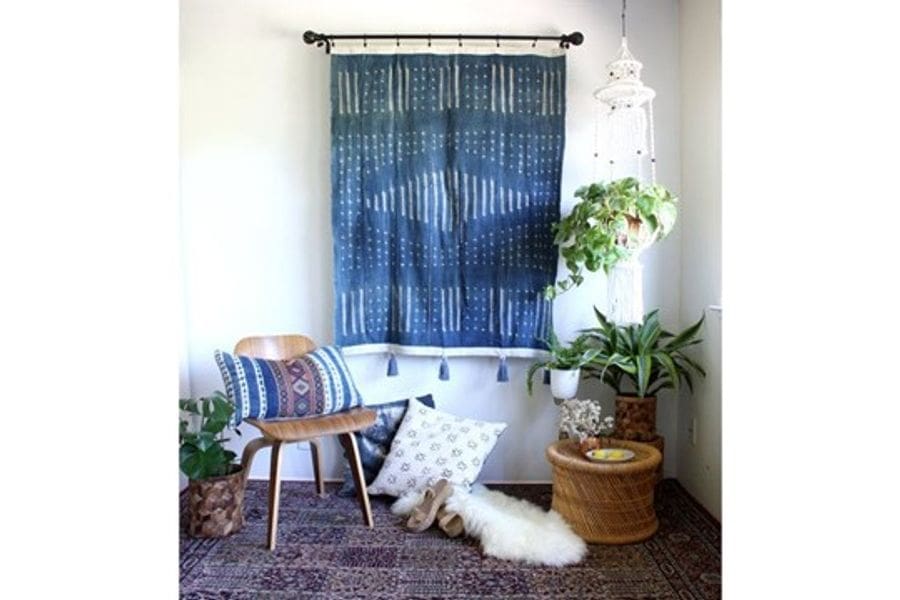
image via Etsy
Have you ever been out window shopping or strolling around your favorite shops, and a garment or perhaps a tapestry catches your eye? Upon further investigation, you see that the pattern is super detailed, and only one color of dye was used; while at first glance, this may look like tie-dye, but this is, in fact, the ancient art of shibori.

(image via Etsy)
By definition, shibori means “to wring, squeeze, and press” in Japanese. While shibori originated in China, it became mainstream in Japan during the Edo Period around the 17th – 19th centuries, but there are shibori textiles that date back to the 8th century.
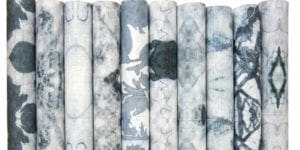 (image via business of fashion)
The art of shibori is very detail-oriented, and the process involves using natural materials to isolate specific areas of fabric to create an intricate pattern. This may sound similar to tie-dye, and in many ways, it is comparable, but the art of shibori is much more time-consuming compared to the more straightforward technique of simply twisting and turning a garment and using an entire spectrum of color versus one color. (Shibori dye is one color!)
Okay, let’s get to the fun, hands-on stuff. Shibori is super doable at home and fun to make. The best part about shibori is that you really can’t mess it up, and you’ll never stop learning along the way. All you need are a few materials, a little space outside, and a favorite playlist for you to have a super relaxing afternoon of creating cool things.
Materials needed:
– An indigo dye kit
– Natural fiber clothing or piece of fabric
– (2) five-gallon buckets
– Rubber gloves
– Small wood squares or rocks
– Rubber bands
– Yarn or twine
– (1) PVC pipe
– A long wooden stick
– A drop cloth or tarp
– Scissors
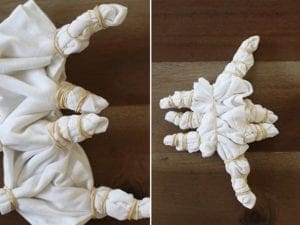
As you choose your clothing or fabric, make sure to stick with a natural fiber such as cotton or linen. Go ahead and wash and dry your fabric before dying it as well.The next part of shibori can be a little intimidating, but keep in mind that this is the part of the process where you can’t mess up and the part of the process where you’ll learn the most. You can use many different techniques when shibori dyeing, but one of the easier ones for beginners is known as “Kumo,” which is a pleat and bind technique. You’ll begin by folding your piece of fabric like an accordion, then pinching and binding into equal sections.
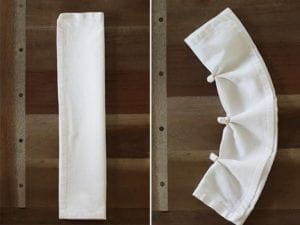
(image via honestly wtf)
Next, do the same thing with the opposite sides in staggered sections.
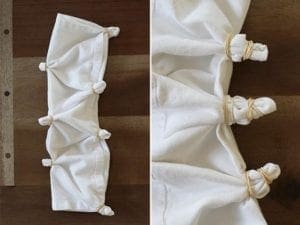
(image via honestly wtf)
Continue binding until you can’t bind anymore, and for this part of the process, you can opt to use rubber bands, twine, yarn, whatever works best for you.
(image via honestly wtf)
Next, you’ll set up your indigo dye by following the instructions with your kit. Most kits are as simple as filling a bucket with water and stirring in the indigo dye until thoroughly combined. At this point, you’ll add soda ash and a reduction agent to the bucket, stirring very gently.
 (image via DIY projects)
Once your dye is ready, you’ll fully submerge your bound fabric into clean water and wring it out thoroughly. Next, you’ll gently manipulate and massage the dye into the fabric. Let the fabric sit in the dye for about five minutes before taking it out. At this point, your material will have a green tint to it, but don’t worry; once oxygen hits your fabric and dye, you’ll start to notice it changing to a gorgeous shade of indigo.
If you want your dye to appear darker, go ahead and dip your fabric again, let it sit in the dye for another five minutes, and continue to repeat this process until you’ve got the fabric as dark as you like.
As tempting as it’s going to be to tear into the pieces and see your gorgeous pattern, the next step is to let the dyed fabric sit overnight. After your material has set overnight, fully submerge your bound fabric into the water, then begin to snip your rubber bands and admire your work! The last step will be to wash your fabric in the washing machine on cold, with no detergent, then allow your fabric to dry on a line or low heat in the dryer and ENJOY!

(image via diy beautify)
Sources: Honestly WTF, Wandering Silk, Japan Objects.