
Following fashion trends is super fun, but we can probably all agree that having unique pieces, especially ones that we’ve handmade ourselves, makes our wardrobe a little more us, ya know? Fashion DIYs are a great way to relax, unwind, and create some cool pieces that are all your own. Go ahead and pour a glass of wine, turn up the 90’s bops, and let’s get creative!
- Bauble Necklace
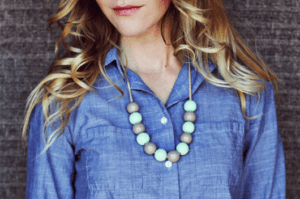
(image via a beautiful mess)
Bauble necklaces are super easy to make because they only require a few materials, and nothing too crazy, at that. These necklaces are also exciting to make because you can personalize them in so many different ways.
We say, get a small group of friends together, make some fun cocktails, and turn on the gang’s favorite flick while you paint your beads and assemble your necklaces.
- Bleach-Dyed Shirts
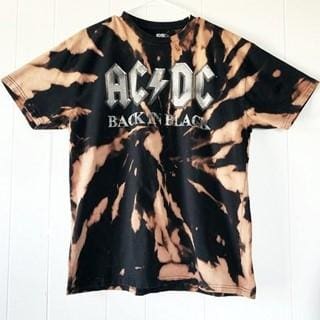
(image via chaotically yours)
It doesn’t get much easier than bleach dyeing. Not only is it easy, but it’s super fun too. The best part? By the time you’re done, you have a completely unique and trendy piece to wear! Grab one (or a few) cotton or cotton-blend tees, get your spray bottle filled with bleach, and step outside to create some colorful magic.
All you have to do is spin your shirt around into the design you want and start spraying. If you’re feeling extra creative, consider making your own stencils out of cardboard to add fun shapes to your DIY bleach-dying project. Then, let your tee sit for a bit and soak up some rays. After 24 hours, throw your shirt in the washer on cold and you’re golden (or should we say, tie-dye rainbow)!
We suggest hitting up your favorite local thrift shop to find some cool vintage tees and shirts in different colors to bleach-dye. Don’t be discouraged if some tees don’t take to the bleach- it happens. If you’re feeling extra edgy, take some scissors to your shirt and crop it or add some destruction.
- Vintage Head Wrap
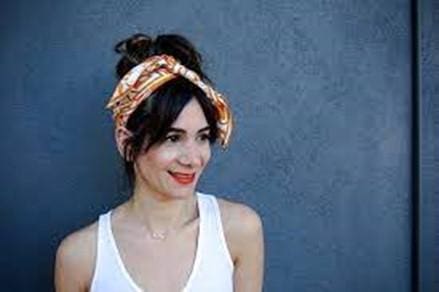
(image via a vintage splendor)
We love what a head wrap made from a vintage scarf can add to an outfit. If you really want to get your head wrap DIY skills on, then be on the lookout for bold vintage scarves to add to your collection to begin perfecting the art of the head wrap.
This is a super easy DIY to add a ton of character to your look, as you don’t even need to do any sewing or trimming, for the most part. All you have to do is fold your scarf into a triangle, put it against your forehead, cross the ends, and wrap them around the top or around the base of your neck. If all else fails, bandanas are a good backup plan for scarfs that just don’t fit right.
- Put a Shape On It
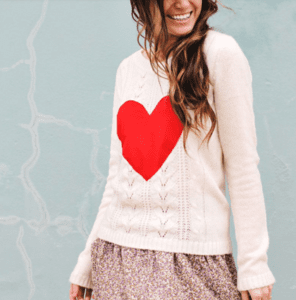
(image via a beautiful mess)
I’m sure we all have a few old sweaters or t-shirts that just look and feel a little blah; why not try to revive those pieces by adding some simple fabric shapes to them? As you can see, sewing a big heart on this sweater totally transformed the entire look.
We love the idea of a daisy, a big smiley face, or even a favorite band logo. All you need is some fabric, scissors, an idea, and a sewing machine (you don’t even have to be good at it!) to give new life to old pieces.
- Crop It
(image via love lola)
Another fun, easy, and trendy DIY fashion statement is a crop top. Grab those old band tees or scour the thrift stores for cool vintage pieces, then simply chop them off. The beauty of making your own crop top is you get to determine the length, and you’re in charge of how long or how short they are.
If you like that super destructed look, go ahead and add some holes while you’re at it to make it look super worn. If you’re going for more of a polished crop top, skip the holes, and maybe opt for a crop top with a tie front instead.
You can crop short-sleeve t-shirts, long-sleeve t-shirts, hoodies, tank tops, and even denim jackets for a variety of looks to go with all your favorite pants.
If you’re ready to get your DIY on and make a statement that is completely original and unique, try out one of these above tips, and leave us a comment below to let us know how it went!