
How do celebrities achieve such beautifully sculpted cheekbones and radiant features? Aside from filler, it’s one word: contouring. If you haven’t heard of it, contouring is an advanced makeup technique that can transform your features by highlighting or downplaying certain parts of your face. Get ready to embrace your inner makeup artist because we’re presenting the full scoop on contouring, along with our best tips and favorite products!
The Basics of Contouring
Before embarking on our contouring adventure, let’s cover some basics. Contouring involves using darker tones to create shadows and lighter shades to highlight specific areas of your face. This technique enhances natural bone structures for a more sculpted appearance.
Tools and Techniques
Here are the three main methods of contouring and our favorite products to help get you started:
Method 1: Cream Contour with a Brush
Cream contour products are an excellent way to begin, as they blend easily and provide a natural-looking result. Use a contour brush and apply the cream one or two shades darker than your skin tone along your outer forehead, the hollows of your cheeks, sides of your nose, and jawline. Blend thoroughly.
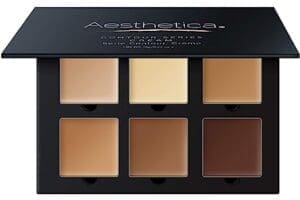
Our Pick: Aesthetica Cream Contour and Highlighting Makeup Kit ($40, shop here)
Method 2: Contour Sticks
Contour sticks offer precise application. Apply the stick directly to the same areas above – temples, sides of the forehead, and below the chin before gently blending it using either a makeup sponge or your fingertips.
 Our Pick: Fenty Beauty Match Stix Sculpt’r Squad (three for $90, shop here)
Method 3: Powder Contouring
Powder contour is ideal for oily or combination skin. We recommend using a fluffy contour brush to apply in light sweeping motions. You can also use this technique to incorporate light powder along areas previously contoured with cream for an airbrushed effect.
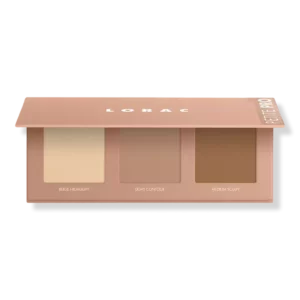 Our Pick: Lorac Petit Pro Contour Palette ($32, shop here)
 Areas to Contour and Highlight
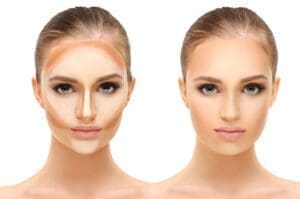
Here are some key areas to contour and highlight to create different looks:
Lifted Cheekbones
To bring out your cheekbones, apply contour just below them, starting near your hairline and toward your apples. Blend, then add highlighter for an instant glow.
 Lifted Eyes
For the illusion of lifted eyes, apply a matte contour shade above the crease of your eyelid from the outer corner toward the center, blending as needed. Add shimmery highlight shades to the brow bone and the inner corner of each eye to make them pop out even further.
 Defined Jawline
For a more defined jaw, apply contour along the jawline, starting at the ears and working toward the chin, ensuring it blends smoothly for a seamless finish. Add highlighter for emphasis.

Slimmer Nose
For an illusion of slimming down your nose, apply a thin line of contour around the sides of your nose, from your eyebrows toward your nostrils. Finish by applying highlighter on the bridge of your nose to add dimension.
 Other Contouring Tips
Blending and Finishing Touches
Blending is key to creating natural-looking contours. Use a clean brush or damp makeup sponge to seamlessly integrate contour and highlight shades into your skin and avoid harsh lines by moving upward and outward with each blending stroke.
 Our Pick: Make Up For Ever #109 HD Skin Foundation Brush ($45, shop here)
Set Your Work with Translucent Powder
Once you’ve blended in contour and highlight shades, set them by dusting them with translucent powder to secure them and ensure long-term wearability.
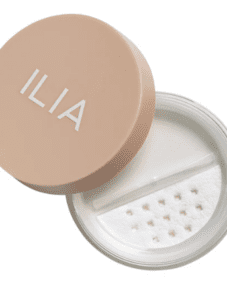 Our Pick: ILIA Soft Focus Finishing Powder ($35, shop here)
Build Gradually
Contouring is all about creating subtle shadows and highlights, so begin slowly. Remember, adding product is easier than removing it, so take your time and be patient!
Choose the Appropriate Shades
When selecting contour and highlight shades, keep your skin tone and undertone in mind. Choose cooler hues for contouring and warm tones for highlighting. This will help you achieve natural-looking results that complement your complexion perfectly.
Practice Makes Perfect
Like any skill, contouring takes practice to master. Don’t be disheartened if your first attempt doesn’t turn out exactly as you imagined. Experiment with various techniques, products, and shades until you find what works. Over time and with practice, you can become a contouring pro!