Setting a proper table sometimes seems like a lost art, but if you’ll soon be hosting a holiday party or fancy dinner party, taking the time to set a formal table is a wonderful way to show guests how much you care. While there are many ways to set a table, today we’ll walk you through a formal dinner setting – because you might as well go big, right?
Why Is Table Setting Important?
We know what you’re probably thinking: Who cares what the table settings look like? Bring on the food! However, proper table setting not only tells your guests that you’re more than happy to dine with them, but that you’re making their space (and food) look good.
Table Setting Tips
Before setting any tables, here are a few helpful tips to remember.
Stick to the Necessities
Even as you set a formal table, only include the pieces you’ll need for your meal. Unnecessary flatware and dishes can intimidate guests, which is the last thing you want.
Napkin Placement Matters
Typically, the first thing a guest grabs is their napkin. While this makes sense, it disrupts the place setting and can lead to forks on the floor. To avoid the chaos, avoid placing napkins below the silverware and instead put them on the plate.
Lead by Example
Some of your guests may not know how or where to start with their place setting, so as the host, take the lead. It’s okay if some dinner party “rules” need to be tweaked (this is your party, after all). More importantly, you don’t need to draw attention to it unless someone asks.
Make Room
As you set your table, leave room for certain dishes (such as salad plates) to be placed after guests finish those parts of the meal.
Setting a Formal Dinner Table

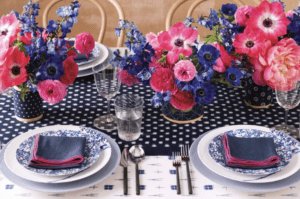
(image via marthastewart.com)
The below formal table setting is designed for a three-course meal, which includes a tablecloth, charger plates, dinner plates, soup bowls, salad plates, bread plates, napkins, salad forks, dinner forks, knives, soup spoons, butter knives, dessert spoons, water glasses, and red and white wine glasses.
- First, lay an ironed tablecloth on your table.
- Next, set a charger plate at each seat. Place a soup bowl in the middle of each charger.
- Place bread plates to the top left of the charger (think 10 or 11 o’clock).
- Place the napkin to the left of the charger. Next to your napkin, place the dinner fork on the inside and the salad fork on the outside. (The outermost utensils are always used first.)
- Place a knife (blade facing toward the charger) to the right of your charger, followed by the soup spoon to its right.
- The butter knife is positioned horizontally (blade facing inward) on the bread plate, with the handle pointing to the right.
- Place the dessert spoon (or teaspoon) directly over the charger with the handle pointing to the right.
- Place a water glass above the knife. Place the white wine glass to the right of the water glass; then, to the right and slightly above, place a red wine glass.


